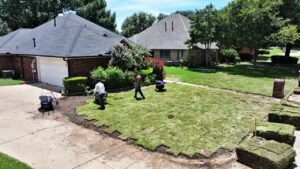
paver driveway installation involves excavating the old surface, laying a compacted gravel base and sand bedding, placing interlocking pavers in your chosen pattern, then filling joints and sealing. It takes about 3–5 days for an average two-car driveway and can last 25–30 years with proper care.
This is one of the smartest upgrades you can make to your home. It not only boosts curb appeal but also adds real value. I’ve seen homeowners light up when they first pull into a driveway that finally matches their style. But before you grab a shovel, let’s walk through the whole experience step by step.
What Is Paver Driveway Installation?
At its core, this process replaces or creates a driveway using individual paving stones instead of poured concrete or asphalt. These stones usually concrete, brick, or natural stone—lock together over a compacted base. This method creates a flexible, durable surface that handles freeze-thaw cycles far better than solid slabs.
But it’s more than just laying stones. The real magic happens underneath: a properly built base. According to the Paver Driveway Installation a strong base is 80% of the job. That’s why you should never skip this part.
Why Choose a Paver Driveway Installation?
Before we get into how it’s done, let’s talk about why homeowners across the USA are choosing this option.
-
Durability: Pavers can last 25–30 years or more.
-
Repairability: If one stone cracks, you replace it—not the whole driveway.
-
Design flexibility: Choose from cobblestone, herringbone, basket weave, and more.
-
Permeability: Permeable pavers reduce runoff and help with drainage.
-
Curb appeal: A custom paver driveway instantly upgrades your home’s exterior.
If you’re still comparing options, our internal guide on Paver Driveway Installation breaks down the pros and cons in plain English.
Planning Your Driveway Project
Good planning saves time, money, and headaches. Start with these three steps:
1. Check Local Codes and HOA Rules
Some neighborhoods have restrictions on materials, colors, or driveway width. Call your local building department before you buy a single paver.
2. Measure and Mark
For a standard two-car driveway, you’ll need roughly 600–800 square feet. Add 5–10% extra for cuts and waste. Use marking paint and stakes to outline the area.
3. Choose Your Pavers and Pattern
Concrete pavers are the most popular because they’re affordable and come in many colors. Brick gives a classic look. Natural stone is premium but pricey. Popular patterns include:
-
Running bond
-
Herringbone (best for driveways because it locks tightly)
-
Basket weave
-
Circular fan
Need inspiration? Check Paver Driveway Installation to see real color blends and textures.
Step-by-Step Paver Driveway Installation Process
Here’s the heart of the experience. We’ll keep it simple, but know this is labor-intensive work.
Step 1: Excavation
Remove grass, old asphalt, or concrete. Dig down about 8–12 inches, depending on soil type and paver thickness. The goal is a flat, sloped base that drains water away from your home.
Step 2: Base Preparation
Lay 4–6 inches of crushed stone (often called “crusher run” or “21A”). Spread it in 2-inch lifts, wet it lightly, and compact each layer with a plate compactor. This base is the backbone of your paver driveway installation.
Step 3: Edge Restraints
Install plastic or metal edging along the perimeter. These keep the pavers from shifting over time. Anchor them with spikes every 12 inches.
Step 4: Sand Bedding
Spread a 1-inch layer of coarse concrete sand over the compacted base. Screed it smooth using pipes or rails. Do not walk on the screeded sand.
Step 5: Laying the Pavers
Start from a corner or edge and work outward. Place pavers straight down into the sand—don’t slide them. Follow your chosen pattern. For a paver driveway installation, a herringbone pattern offers the best interlock for vehicle traffic.
Step 6: Cutting Pavers
Use a wet saw or guillotine splitter to cut edge pieces. Wear safety glasses and ear protection. Dry-fit first, then cut once.
Step 7: Compacting the Pavers
Run a plate compactor over the pavers to set them into the sand. This step also helps the sand vibrate up into the joints. Use a rubber mat or pad on the compactor to avoid scratching the surface.
Step 8: Joint Sand
Sweep fine polymeric sand into the joints. Polymeric sand hardens when wet, locking pavers together and preventing weeds and ants. Sweep off excess, then mist lightly with water.
Step 9: Final Compaction and Sealing
Compact once more, then apply a quality sealer if desired. Sealing enhances color and adds stain resistance. Wait at least 24–48 hours before driving on the new driveway.
Pro tip: The entire paver driveway installation typically takes 3–5 days for a standard two-car driveway. Weather delays can extend that, so plan around a dry forecast.
Cost and ROI of a Paver Driveway
In the USA, a professionally installed paver driveway usually costs $12–$25 per square foot, including materials and labor. That means a 700-square-foot driveway could run $8,400–$17,500. DIY materials alone often cost $4–$8 per square foot, but the labor savings come with a steep learning curve.
Average return on investment: Real estate experts often cite a paver driveway as one of the top exterior upgrades, with an ROI of 50–75%. It’s not just about money—it’s about the feeling of coming home.
For a detailed breakdown, see our internal post on Paver Driveway Installation.
Maintenance After Your Paver Driveway Installation
Once the project is complete, keep it looking new with simple habits:
-
Sweep or leaf-blow weekly.
-
Rinse with a garden hose monthly.
-
Reapply joint sand every 2–3 years.
-
Reseal every 3–5 years, depending on traffic and weather.
-
Treat oil stains immediately with a degreaser.
Avoid using metal shovels on the surface in winter plastic blades are safer. If you live in a snowy area, de-icing salts can damage some sealers, so check the manufacturer’s instructions.
Common Mistakes to Avoid
Even small errors can ruin the whole project. Here’s what to watch for:
-
Skipping base compaction: Leads to dips and sinking.
-
Using the wrong sand: Play sand is too fine; use concrete sand.
-
Forgetting edge restraints: Pavers will spread and lose interlock.
-
Rushing the screeding: Uneven sand means uneven pavers.
-
Ignoring drainage: Always slope at least 1% away from the house.
Conclusion:
This project is more than a home improvement it’s an experience that transforms how your property looks and feels. From the first shovel of dirt to the final sweep of joint sand, every step matters.If you’re ready to start, take your time planning. Compare colors, patterns, and materials. And don’t be afraid to call in a local pro for at least the base preparation. Your back will thank you.or more maintenance tips after installation, visit our Paver Driveway Installation. Or if you’re ready to get quotes, check our Paver Driveway Installation.