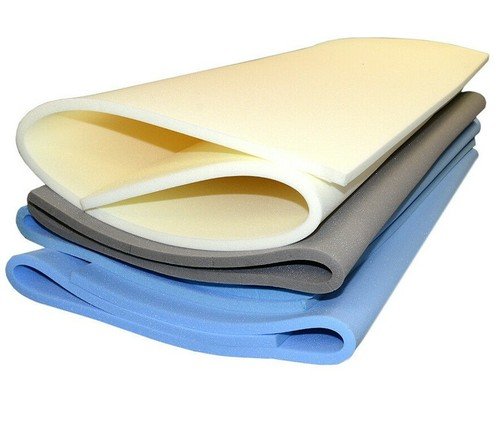
Upholstery foam sheets, Cutting and installing foam may seem like a simple DIY task, but getting clean edges and the right fit takes a little care. Whether you are repairing an old sofa, making new cushions, updating a bench seat, or building a comfortable sleeping surface, choosing the right foam and cutting it correctly can make a big difference.
With a few basic tools and the right technique, you can handle most foam projects at home. The key is to measure carefully, use a sharp cutting tool, and avoid compressing the material while cutting.
Choose the Right Foam for Your Project
Before cutting, think about where the foam will be used. A seat cushion needs enough firmness to support body weight without becoming uncomfortable. Back cushions usually require softer foam, while mattresses and sleeping surfaces need foam designed for longer periods of use.
Upholstery foam sheets, the thickness and density also matter. A thicker piece is not automatically better. For example, a dining bench may work well with medium-density foam, while a mattress application may require a different construction altogether.
If you are creating a sleeping surface from scratch, a custom foam mattress can be a useful option because it can be made to match the exact size and shape you need. For seating projects, however, standard foam can often be cut to size without much difficulty.
Measure the Area Carefully
Accurate measurements are the most important part of the job. Start by measuring the length, width, and required thickness of the space where the foam will go.
Measure each dimension at least twice. If the old cushion is available, you can use it as a reference, but do not assume it is perfectly square. Older cushions can become compressed or distorted over time.
When measuring a cushion cover, check whether it has seams, piping, or other features that affect the interior space. Foam should generally fit snugly without being forced into the cover.
Write your measurements down before making any cuts. A small mistake at this stage can result in wasted material.
Mark the Foam Before Cutting
Place the foam on a large, flat surface. A clean floor, workbench, or large table can work well.
Use a measuring tape and a straightedge to mark your cutting lines. A washable marker or chalk is usually suitable. For long cuts, connect several measurement points rather than trying to draw the entire line freehand.
If the foam has a specific orientation or shape, mark the top and bottom as well. This is particularly useful when making multiple pieces.
For rounded corners, create a paper or cardboard template first. Place the template over the foam and trace around it. This gives you a more consistent shape than trying to estimate the curve directly.
Use the Right Cutting Tool
The quality of your cutting tool has a major effect on the final result. A sharp electric carving knife is one of the most popular choices for thicker foam because it can move through the material smoothly.
For thinner pieces, a long, sharp utility knife may work. Use a fresh blade whenever possible. A dull blade tends to drag through the foam, producing uneven edges and unnecessary tearing.
When working with upholstery foam sheets, avoid using excessive force. Let the blade do most of the work. Move slowly and follow your marked line.
Always keep your fingers away from the cutting path. If possible, use a stable cutting surface underneath the foam so the blade does not contact the floor or furniture.
How to Make a Straight Cut
For a straight cut, position a long ruler or straightedge along your marked line. Hold it firmly while guiding the knife beside it.
Do not try to cut through very thick foam in one aggressive motion. Instead, make a controlled pass and gradually work through the material. Keeping the blade as straight as possible helps prevent angled edges.
Another useful method is to slightly compress the foam around the cutting area. However, do not squeeze it excessively because this can change the position of your cutting line.
After completing the cut, inspect the edge. If there are small uneven areas, carefully trim them rather than trying to remove a large amount of material at once.
Cutting Curves and Corners
Curved cushions require more patience. Start by transferring your template accurately onto the foam.
For outside curves, make small, controlled movements with your knife. Turning the foam while cutting can sometimes be easier than trying to turn the blade sharply.
For inside corners, make shallow cuts first and gradually remove the excess material. Avoid cutting past your marked line because replacing removed foam is much harder than trimming a little extra.
If you are making several matching cushions, use the first piece as a template for the others. This helps keep the dimensions consistent.
Test the Fit Before Installing
Once your foam has been cut, place it inside the cushion cover or onto the furniture frame. Do not glue anything yet.
Check all four sides and the corners. The foam should sit properly without large gaps. At the same time, it should not be so oversized that you have to force it into position.
A snug fit is usually desirable for cushions because it helps create a fuller appearance. If the foam is slightly too large, remove it and trim a small amount at a time.
This step is especially important when working with upholstery foam sheets, because even a small measurement error can become obvious once the cover is installed.
Installing Foam With Adhesive
Some projects require adhesive to keep the foam in place. Spray adhesive designed for foam is commonly used for this purpose.
Before applying anything, make sure the surfaces are clean and dry. Follow the adhesive manufacturer’s instructions carefully. Apply the adhesive evenly and avoid soaking the foam.
Position the foam slowly. Once the surfaces make contact, some adhesives can bond quickly, making repositioning difficult.
For a removable cushion, adhesive may not always be necessary. The cover itself can hold the foam securely when the dimensions are correct.
Using Foam for Mattress Projects
Foam is also useful when creating or replacing sleeping surfaces. In these projects, comfort, support, thickness, and density deserve extra attention.
If you need a sleeping surface for an unusual bed frame, camper, boat, guest room, or other space, a custom foam mattress can be made to fit specific dimensions. This can be helpful when a standard mattress size does not work.
If you are layering different foam types, make sure each layer is suitable for its intended purpose. A supportive base combined with a softer comfort layer can create a more balanced sleeping surface.
A custom foam mattress may also be considered when you need a specific thickness or shape that is difficult to find in standard products.
Finishing and Covering the Foam
After the foam is cut and tested, place it inside its final cover. A fabric cover with a zipper makes future cleaning and replacement easier.
When inserting the foam, compress it gently and work it into the corners rather than pulling aggressively on the fabric. For larger cushions, folding the foam slightly can make installation easier.
Once the foam is inside, check the seams and corners. Smooth out any wrinkles in the cover before closing the zipper.
For projects involving upholstery foam sheets, taking time during the finishing stage can make the difference between a homemade-looking result and a professionally finished cushion.
Final Tips for Better Results
Measure twice before every major cut. Keep your blade sharp, work slowly, and always test the fit before applying adhesive.
It is also smart to buy a little extra foam if your project involves complicated shapes. Having spare material gives you room to correct mistakes without starting the entire project again.
If you are working on a simple cushion, DIY cutting can be straightforward. For larger or more specialized sleeping projects, professionally cut foam may save time and provide a more precise result.
The goal is not simply to cut foam quickly. It is to create a piece that fits correctly, feels comfortable, and remains useful for years. With careful measurements and the right tools, even a first-time DIYer can achieve a clean and practical finish.