Introduction: Finally, a Logo That Beats Factory Quality
You bought an Elna embroidery machine because it promises precision. The dual feed, the smooth hoop movement, the legendary stitch quality. But then you load a logo from your laptop, hit start, and watch in horror as the needle chews up your fabric like a confused woodpecker. The problem is not your machine. The problem is the file you fed it. Elna machines, especially models like the Elna 8300 or the Excellence series, crave properly digitized designs. A sloppy conversion leads to thread nests, birdnesting underneath the hoop, and letters that look more like blobs than words. So let us fix that. Right here, I will show you how to Convert Logo to Embroidery for Elna Embroidery Machine so every stitch lands exactly where you want it. No guesswork. No wasted thread. Just crisp, pro-level results on caps, denim jackets, and even those tricky workout shirts.
Why Your Elna Machine Hates Bad File Conversions
Here is the raw truth. Elna machines use a specific flavor of stitch data. They typically read .PES, .DST, .EXP, and .VIP formats. But the file extension is only half the story. Inside that file, you need correct stitch density, pull compensation, and underlay sequencing. If you hand your Elna a file digitized for a cheap flatbed machine, the tension will go sideways fast. Your top thread might loop underneath. Your bobbin might show on top. Worse, the machine could throw error codes because your design exceeds the hoop size or includes unsupported color changes. Converting a logo the right way means tailoring every parameter to how an Elna moves. That machine uses a rotary hook and a specific acceleration curve. Push too many stitches per inch, and the fabric puckers. Use too few, and you see hoop gaps. A clean conversion respects those limits.
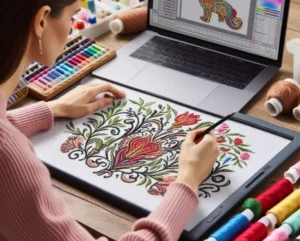
Step One: Start With a Logo That Plays Nice
Do not grab that fuzzy PNG off your Facebook page. Open your original vector file if you have one. Look for Adobe Illustrator (.AI), CorelDRAW (.CDR), or even a high-resolution PDF. No vector? No problem. Use a PNG with at least 300 dots per inch and a transparent background. Remove gradients, drop shadows, and any thin lines thinner than a mechanical pencil lead. Why? Because embroidery cannot sew a gradient. It uses parallel rows of thread to simulate color fills. Convert those gradients to solid color blocks manually before you digitize. Also, simplify your palette. Your Elna can handle up to sixteen colors in a design, but every color change means you stop, cut thread, rethread, and press go again. Stick to four colors or fewer for a smooth production run.
Step Two: Pick the Right Digitizing Software for Elna
You have three solid options here. First, use Elna’s own software. Elna partners with companies like Premier+ or EmbroideryWorks. These tools include native drivers for Elna machines. They let you set your exact model number, hoop size, and even thread tension presets. Second, use Wilcom or Hatch. Both export to .PES and .DST, which your Elna reads fine. The key is choosing the “Elna” or “commercial rotary” preset during export. Third, try free tools like InkStitch with the Ink/Stitch plugin. It takes longer to learn, but you can tweak every stitch parameter manually. Avoid online-only converters that promise a one-click solution. They ignore pull compensation and underlay settings, which your Elna desperately needs.
Step Three: Set Up Your Hoop and Fabric Correctly
Before you even open the digitizing software, decide on the final sewn size. A logo that looks perfect at four inches wide might turn into a thread-choked mess at one inch. For small lettering under a half inch tall, increase your underlay density so the base layer holds the fabric steady. For large fill areas over two inches across, reduce the stitch density to about 0.4 millimeters between rows. Elna machines sew smoothly at lower densities. Also, match your hoop to the design. Do not stuff a six-inch logo into a four-inch hoop and hope for the best. Use a hoop that leaves at least a half inch of fabric around all sides. Clip the excess fabric out of the way so the hoop arm moves freely.
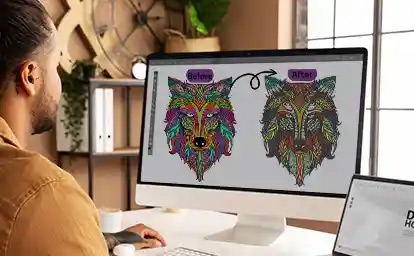
Step Four: Digitize With Elna’s Quirks in Mind
Here is where the magic happens. Open your cleaned-up logo in your digitizing software. Import the artwork as a template. Then use the manual digitizing tools to trace each color region. For borders and lettering, use satin stitches. Set the stitch width between 1.5 and 4 millimeters depending on how bold you want it. For large fills, use tatami or run stitches at a 45-degree angle. Why 45 degrees? Elna machines handle diagonal stitches better than pure horizontal or vertical rows. Diagonal reduces pull on the fabric and hides minor tension variations. For underlay, add a center run stitch for small areas or a zigzag for large fills. This stabilizes the fabric before the top stitches go down. And always add pull compensation. Add about 0.2 millimeters to the width of satin columns. Add 0.3 millimeters to the height of small letters. This tiny adjustment stops your “O” from turning into a skinny oval.
Step Five: Test Stitch on Real Fabric
I cannot say this loudly enough. Do not sew directly onto your expensive jacket. Hoop up a scrap of the exact same fabric type. Use the same stabilizer you plan to use in production. Run the design at your machine’s default speed of about 600 stitches per minute. Watch for three things. First, look at the underside. You should see a neat line of bobbin thread with no looping. Second, check the edges of satin stitches. They should look smooth, not jagged. Third, inspect corners and sharp turns. Elna machines slow down automatically at corners, but if you see thread bunching, reduce the density by ten percent. Run the test again. Keep adjusting your pull compensation and density until the test stitch-out looks clean from six inches away. That is your working file.
Common Elna Errors and How to Fix Them
You will see these error codes at some point. Error E1 means your design exceeds the hoop area. Go back to your software and scale the logo down by ten percent. Error E3 signals a thread break. Usually, your top tension is too tight or your needle is dull. But sometimes, the file has a rogue jump stitch where the machine tries to move across open space without trimming. Open the file in your software, find that long jump, and add a trim command. Error E6 means the machine cannot read the file format. Double-check that you exported as .PES or .DST for Elna. Some older Elna models only read .VIP. Check your manual.
Best Threads and Needles for Elna Conversions
Even a perfect file fails with cheap thread. Use polyester thread from Madeira, Isacord, or Robison-Anton. These threads have consistent thickness and minimal fuzz. Match your needle size to the thread weight. Use a size 75/11 needle for lightweight thread and thin fabrics. Use a size 90/14 for thicker thread and denim. Your Elna’s top tension should sit between 3.5 and 4.5 for most designs. Lower the tension to 3.0 for loose weaves like linen. Raise it to 5.0 for tight weaves where stitches sit on top of the fabric. Write these settings on a sticky note next to your machine.
Speed Settings That Save Your Stitches
Elna machines sew beautifully at 400 to 600 stitches per minute for most logos. Drop to 350 stitches per minute for small lettering under a half inch. Drop to 300 for delicate fabrics like silk or performance mesh. Why slow down? The needle spends less time heating the fabric, and the thread has more time to lock into place. Your production time increases slightly, but your stitch quality skyrockets. For large fill areas, you can bump up to 800 stitches per minute. The fill stitches are less visible, so speed matters less.
When to Call a Professional Digitizer
Look, you can learn to digitize. But if your logo has more than three colors, includes tiny text, or needs to match exactly on both left chest and full back sizes, hire a pro. A good digitizer will ask for your Elna model number, hoop size, fabric type, and even your preferred thread brand. They will send you a sew-out photo before you pay. Expect to spend twenty to forty dollars per logo design. That includes unlimited revisions until the test stitch passes your quality check. Compare that to the cost of ruined blanks, broken needles, and your own time. Suddenly, forty dollars looks cheap.
Conclusion: Perfect Stitches Are a File Away
Your Elna embroidery machine is a beast. It wants to sew clean, professional logos. But it cannot read your mind or your JPEGs. You have to speak its language through proper digitizing. Start with a clean source file. Use digitizing software that respects Elna’s tension and acceleration quirks. Test on real fabric before you commit to the final garment. And never skip pull compensation. Do these steps once, and you will never go back to guessing. Your hats will look sharp. Your polos will stay flat. And your machine will purr through every color change like a dream. Now go convert that logo and let your Elna do what it does best.