Introduction: You Can Digitize Without Spending a Dime
I remember the first time I wanted to turn my kid’s crayon drawing into an embroidery patch. I looked up digitizing software prices and nearly fell off my chair. Hundreds of dollars just to convert one simple sketch? No thanks. That is when I discovered a better way. You absolutely can digitize XXX embroidery files for free without pirating anything or begging for trial extensions. All you need are the right tools and a little patience.
Here is the truth. Expensive software makes digitizing easier and faster. But free tools get the job done just as well for personal projects. Whether you sew on a Janome, Brother, or Singer machine, free digitizing exists. You just have to know where to look and how to adapt.
In this guide, I will show you exactly how to turn your images, logos, or handwriting into stitch-ready files at zero cost. I will walk you through real tools, step-by-step workflows, and common mistakes to avoid. No fluff, no hidden fees, no fake “free” offers that lock you out after seven days.
What Does Digitizing Actually Mean?
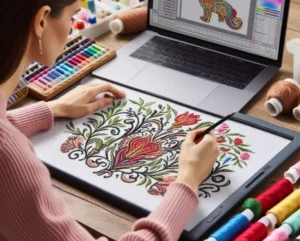
Let us back up for one second. Digitizing means converting a regular image, like a JPG or PNG, into an embroidery machine file format. That file contains stitch coordinates, thread color changes, and pull compensation data. Your machine reads this file and moves the needle accordingly.
Free digitizing sounds too good to be true, right? It is not magic. Free tools require more manual work from you. They do not have one‑click auto‑digitizing like Wilcom or Hatch. But they give you total control over every stitch. For personal projects, that trade‑off works beautifully.
The Best Free Tool for Digitizing: Ink/Stitch
If you use only one free tool, make it Ink/Stitch. This open‑source extension runs inside Inkscape, which is also free. Together, they replace software that normally costs five hundred dollars or more.
Here is how you set it up. Download Inkscape from its official website. Then download the Ink/Stitch extension from inkstitch.org. Install both, and you are ready to go.
Ink/Stitch does not auto‑digitize like commercial programs. Instead, you trace your image manually using vector paths. Then you assign stitch types, like satin or fill stitches, to each path. The extension calculates the actual stitch points and exports your design as a JEF, PES, DST, or even JAN file.
The learning curve feels steep at first. I spent two hours watching YouTube tutorials before my first successful sew‑out. But once you understand the workflow—trace, assign params, simulate, export—you digitize faster with each project. And the price stays free forever.
How to Digitize a Simple Design Using Ink/Stitch
Let me walk you through a real example. Say you want to digitize a heart shape for a Valentine’s Day towel.
Step one: Open Inkscape and draw or import your heart image. Use the Bezier pen tool to trace the outline as a single closed path. Keep your anchor points smooth.
Step two: With the path selected, open the Ink/Stitch extension panel. Choose “Satin” as your stitch type because a heart outline looks best with dense, parallel satin stitches.
Step three: Adjust your stitch parameters. Set stitch length to 2.5 millimeters and density to 0.4 millimeters. These numbers work well for cotton fabric. Tweak them based on your thread and material.
Step four: Run the simulation. Ink/Stitch shows you exactly where each needle punch falls. Look for gaps or overlapping stitches. If you see a problem, adjust your path or stitch settings.
Step five: Export as your machine’s format. For Brother machines, choose PES. For Janome, choose JAN. Save the file to a USB drive and sew a test.
That first test might fail. Mine did. My satin stitches pulled the fabric into a sad wrinkled lump. So I went back, added underlay stitches, and reduced density. Second attempt sewed out beautifully. Free digitizing means you learn by doing, and every mistake teaches you something.
Other Free and Freemium Options
Ink/Stitch is not your only free option. Here are a few others worth trying.
MyEditor is an online tool that converts simple black‑and‑white images to embroidery files. Upload a BMP, choose your stitch type, and download a JEF or PES file. It works okay for basic shapes but struggles with curves and fine details. Still, for a zero‑download solution, it gets the job done for tiny personal projects.
EmbroideryWare offers a free trial of their standard version. The catch? It limits you to 10,000 stitches per design. That works fine for small monograms or pocket logos. Ten thousand stitches cover a two‑inch by two‑inch design at average density. For larger projects, you need to upgrade.
You can also use the free built‑in digitizing in some embroidery machines. Certain Brother and Janome models include a basic digitizing feature on their built‑in screen. You trace a design using the touchpad. It feels clunky, and you cannot export the file, but you can stitch directly from the machine’s memory. Good for quick kitchen towels, not for complex artwork.
Workarounds When Free Tools Hit Limits
Sometimes a free tool simply cannot handle what you want. Do not give up. Use clever workarounds.
Workaround one: split your design into multiple files. If a free tool caps you at ten thousand stitches, break a large logo into two or three parts. Stitch them separately and align carefully on the fabric. Use a water‑soluble marker to draw registration marks before you start.
Workaround two: convert vector graphics instead of raster images. Free digitizing tools hate pixelated JPGs. Convert your image to a clean SVG first using a free online converter like Vectorizer.io. Ink/Stitch handles SVG paths much better than bitmaps.
Workaround three: trace by hand on paper then scan. Sometimes low‑tech beats high‑tech. Draw your design on grid paper, scan it, and convert the scan to a high‑contrast bitmap. Feed that bitmap into MyEditor. The manual tracing removes the digital noise that confuses auto‑converters.
Common Free Digitizing Mistakes and Fixes
I made all these errors so you do not have to.
Mistake one: skipping the simulation step. You see a beautiful on‑screen design and assume it stitches perfectly. Then your machine sews a chaotic nest of thread. Always, always run the stitch simulation. Ink/Stitch shows you red dots for needle penetrations. If the red dots look scattered, your stitch params are wrong.
Mistake two: forgetting underlay. Underlay stitches sit beneath the top thread. They stabilize knits and stop wovens from shifting. Free tools do not add underlay automatically. You must add a second path underneath your main design and assign a light running stitch to it.
Mistake three: ignoring pull compensation. Fabric stretches under needle tension. Your digitized shape shrinks slightly as you sew. In Ink/Stitch, you add pull compensation by offsetting your satin outlines outward by 0.2 to 0.3 millimeters. Test on scrap fabric first.
When Free Is Truly Free (and When It Is Not)
Watch out for fake free offers. Some websites promise free digitizing but deliver low‑quality auto‑conversions with watermarks or stitch limits. Others give you a seven‑day demo then auto‑bill your credit card. Read the fine print.
Real free means no time limit, no credit card required, and full export access. Ink/Stitch and MyEditor (basic tier) meet that standard. Open-source tools stay free forever because volunteers build and maintain them.
If a tool asks for your payment info upfront, run away. Legit free tools never do that.
Conclusion: Start Stitching Without Breaking the Bank
You do not need five‑hundred‑dollar software to make beautiful embroidery. With Ink/Stitch, a little patience, and a willingness to learn, you can digitize XXX embroidery files for free for every personal project. Start with simple shapes like hearts or stars. Watch a few YouTube tutorials. Sew test after test on cheap muslin fabric.
Each failed attempt teaches you something new about stitch density, underlay, or pull compensation. And when you finally see your own design stitch out perfectly, the pride beats any paid software license.
So grab that crayon drawing, that handwritten quote, or that company logo you want for your jacket. Fire up Inkscape. Install Ink/Stitch. And start digitizing today. Your embroidery machine is waiting, and your wallet thanks you.